Hugo with Gitalk
The comment system is an essential component for blogs. While dynamic websites often have built-in comment areas, static web pages usually rely on third-party comment systems. Hugo is a lightweight blog generator, and adding a comment system can enhance its functionality.
This article documents the development process of implementing a comment system for this blog.
To set up my blog, I am using the hugo-tranquilpeak-theme. In the blog repository’s config.toml file, there is a section to configure comments:
  # --------------
  # Comment system
  # --------------
  [params.comment]
    [params.comment.disqus]
      enable = true
      shortname = <shortname from Disque>
    [params.comment.gitalk]
      enable = true
      clientId =  ******
      clientSecret = ******
      owner = "veraz00"
      repo = "veraz00/blog_comments"
      # See all options: https://github.com/gitalk/gitalk#options
      [params.comment.gitalk.options]
        language = "en"
        perPage = 10
        distractionFreeMode = false
        enableHotKey = true
        pagerDirection = "first"
Use Gitalk to Set Comment Sections
I followed this blog to add Gitalk to my blog repository.
However, I encountered an issue due to the blog link not being registered with Disqus (the comment platform). To resolve this, I needed to register the blog with Disqus by following these steps:

Register the Blog Site to Disque
- Create an account on Disqus
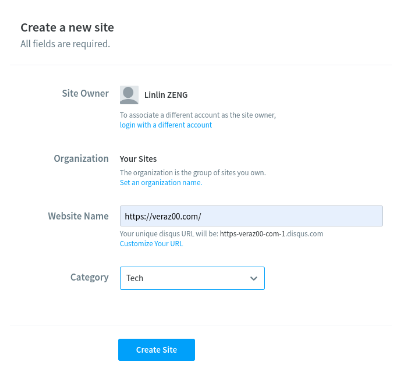
- Click on New Site in the upper-left corner.
- Create a site on Disqus and enter the Website Name as the blog link.
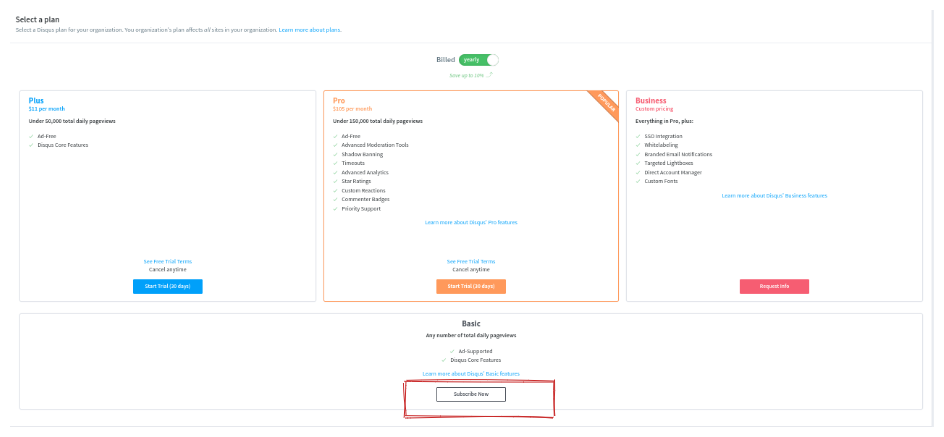
- Subscribe the basic free plan.
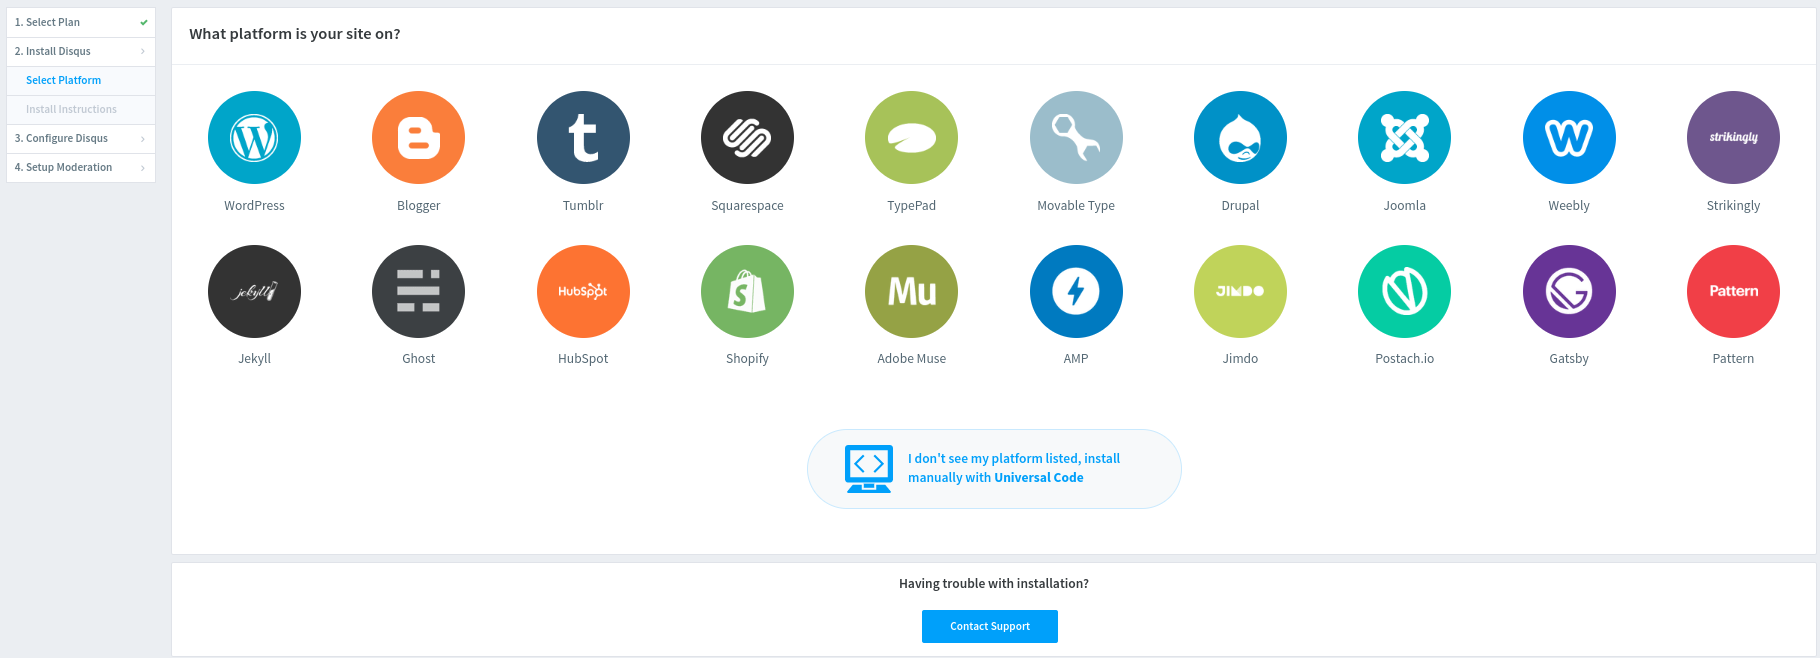
- On the Select Platform step of the Install Disqus section, you can skip it if your platform is not listed.
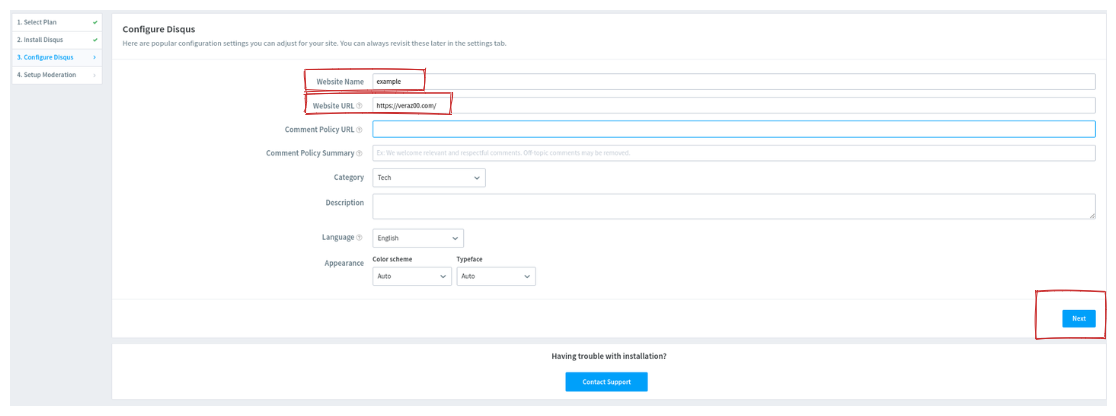
- On 3. Configure Disqus, fill in Website Name and Website URL, then Click Next.
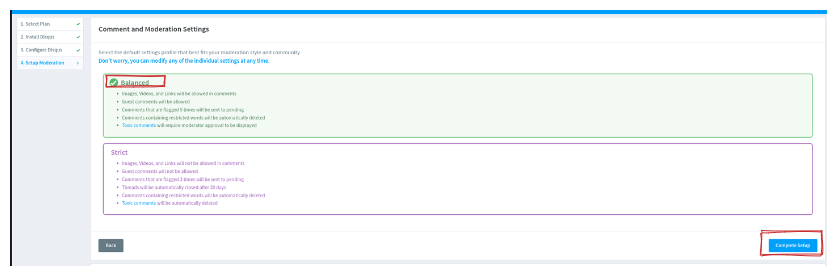
- Coming to 4. Setup Moderation, Choose Balances, which allows all types of comments from guests or GitHub users.
- Click on Complete to finish the blog site registration on Disque
- Obtain the shortname for the registered blog link from Disqus
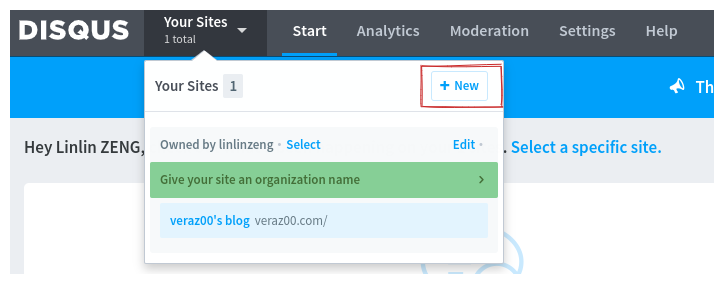
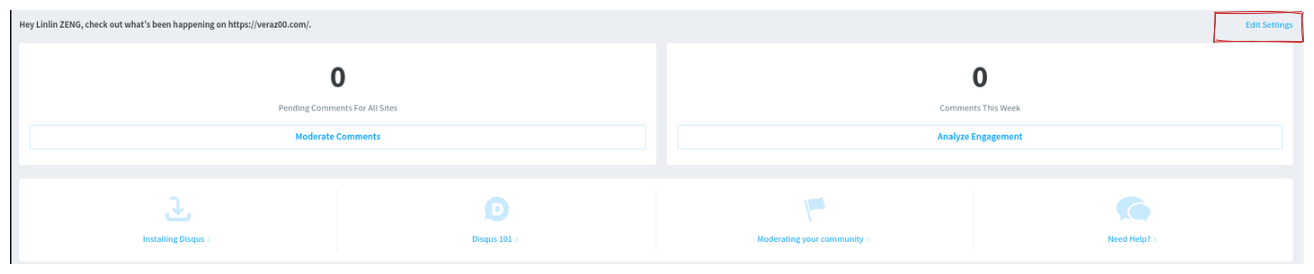
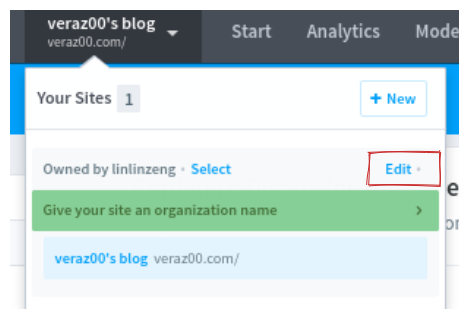
- After clicking Complete, you will be on the site page. Click on Edit Setting to access the site settings.
Note: what can u do when accidentally closing the site page? you can access the settings by clicking on Your Sites > Edit in the upper-left side.**
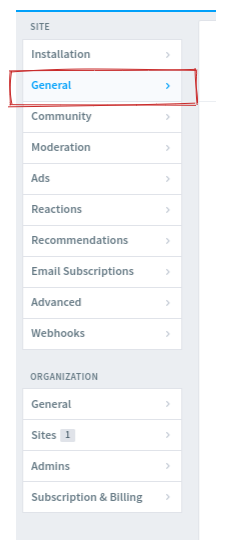
Then click on General on Site section on left bar. That also can help u redirect to site general setting
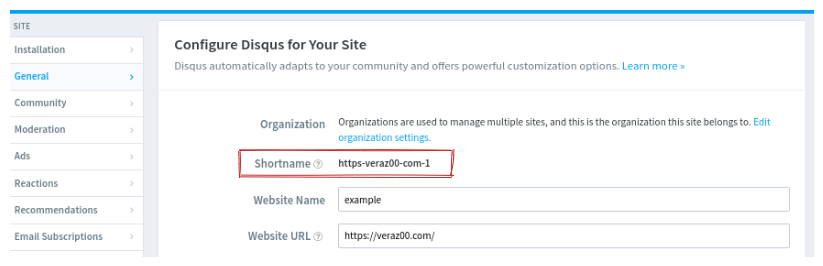
Copy the value of shortname on Shortname and fill it into [params.comment.disqus] in the config.toml file in your blog repository
This shortname is the unique identifier assigned to a Disqus site. All the comments posted to this blog site are referenced with the shortname. The shortname tells Disqus to load only your site’s comments, as well as the settings specified in your Disqus admin.
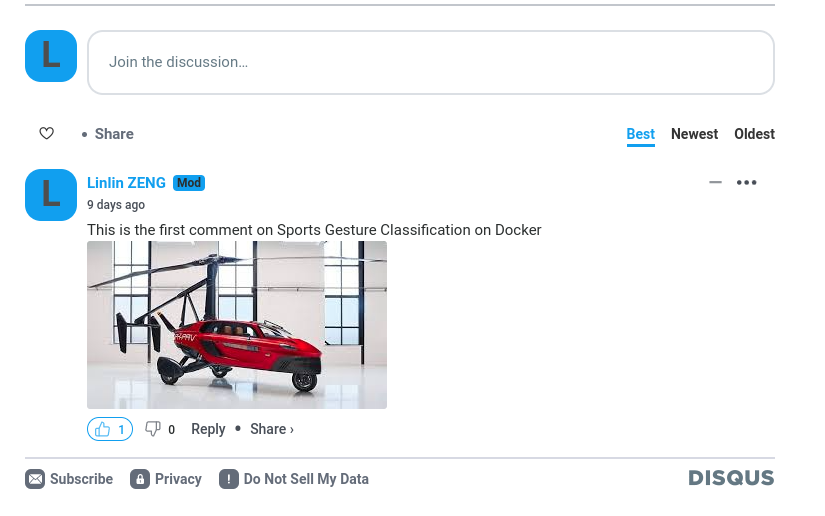
- Finally I can see the comment area when it is published into public, instead of locally. All comments are also saved on the Disque account.
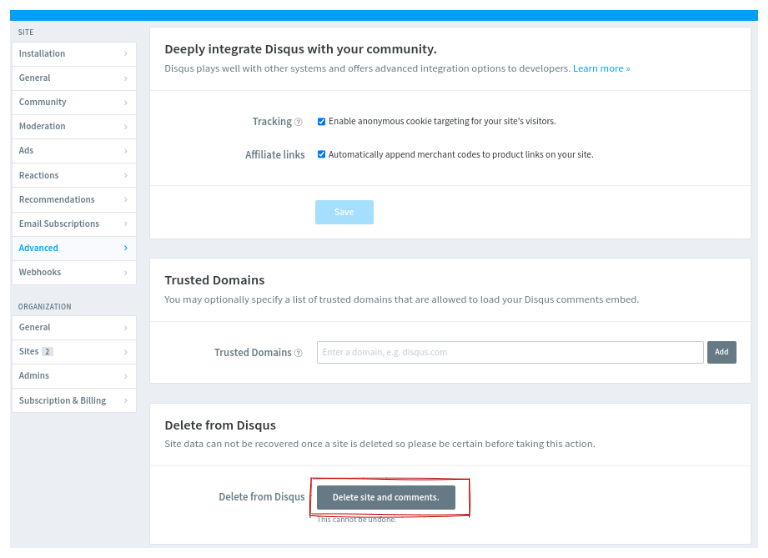
- To remove the site from Disqus, go to Your Sites > Edit on the upper-left side, then navigate to the Advanced page. Near the bottom, click the ‘Delete site and comments’ button. That can delete the site registeration on Disque.